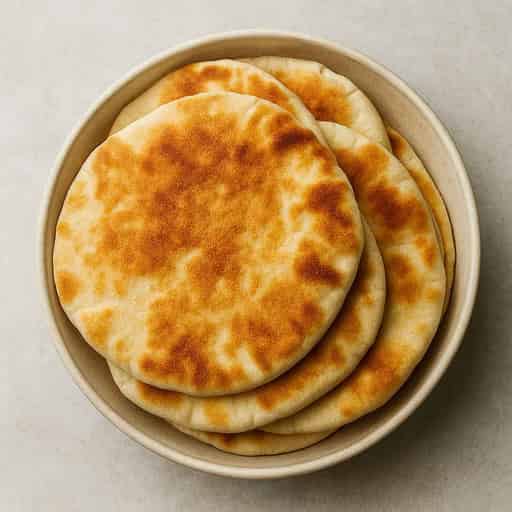
Make soft, chewy pita bread without an oven using a yeast dough and a hot stovetop pan. These pitas puff into pockets and are ready for dips, wraps, and sandwiches.
Prep time
30 min
Cook time
20 min
Total time
2 hr 30 min
Servings
14
Recipe Snapshot
DifficultyMedium
MealBreakfast / Lunch
Meal PrepExcellent
Freezer FriendlyYes
Family FriendlyYes
CuisineMiddle Eastern
Chef's Tips
Use warm, not hot, water so the yeast stays active.
Rest the dough after rolling so it does not spring back in the pan.
Roll evenly; thick spots prevent the pita from inflating into a pocket.
Keep the pan properly hot and cook the pitas one at a time for the best puff.
Wrap cooked pitas in a towel immediately to keep them soft.
Tools Used
We use affiliate links, which may earn us a small commission at no extra cost to you.
Ingredients
Ingredients
Servings
14 servings1×
Scale
Ingredient amounts update instantly.
Dough
Optional Serving Ideas
Instructions
Mix and Knead the Dough
- 1
Combine the flour, yeast, sugar, and salt in a stand mixer bowl or large mixing bowl. Add the olive oil and most of the warm water, then mix until a shaggy dough forms. Add the remaining water gradually; you may not need every drop.
- 2
Knead with a dough hook for 8–10 minutes, or by hand for 12–15 minutes, until the dough is smooth, elastic, and slightly tacky but not wet.
First Rise
- 1
Shape the dough into a ball, place it in a lightly oiled bowl, and cover. Leave at room temperature for 60–90 minutes, until doubled in size.
Divide and Shape
- 1
Turn the dough onto a lightly floured surface and divide it into 14 pieces of about 120 g each. Shape each piece into a smooth ball, cover, and rest for 15 minutes.
- 2
Roll each ball into an even 18–20 cm round, using only enough flour to prevent sticking. Cover the rounds and rest for another 10–15 minutes.
Cook the Pitas
- 1
Heat a dry nonstick or cast-iron pan over medium-high heat until hot. Do not add oil; a dry surface helps the dough grip and inflate.
- 2
Cook one pita for about 45–60 seconds, until bubbles appear and the underside has light golden patches. Flip and cook for another 45–60 seconds, then flip once more if needed until fully puffed and cooked through.
- 3
Wrap each cooked pita in a clean kitchen towel while you cook the rest. This traps steam and keeps the bread flexible.
Serve
- 1
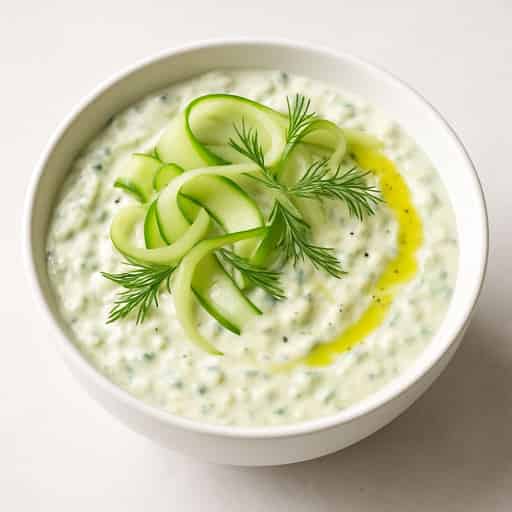
Serve warm with hummus, tzatziki, falafel, chicken shawarma, or salad fillings. Split the pitas carefully if a pocket has formed.
Plan This Recipe
Save this recipe to one of your meal plans or browse your existing plans.
Learn More
Everything you want to know about this recipe.
Homemade Pita Bread Without an Oven
Homemade Pita Bread Without an Oven
This stovetop pita bread recipe makes soft, chewy rounds without turning on the oven. The yeast dough is rolled thin, cooked on a dry hot pan, and flipped as bubbles form so steam can inflate the centre into a pocket.
The dough makes 14 pitas of about 120 g each. That size is large enough for stuffing with falafel, chicken shawarma, hummus, or salad, while remaining easy to cook one at a time in a standard frying pan.
Why This Recipe Works
Why This Recipe Works
The dough uses enough water to stay flexible without becoming difficult to shape. A small amount of oil tenderises the bread, while the modest sugar addition helps with colour without making the pita sweet. Yeast provides the lift and flavour, and the two rests after dividing and rolling allow the gluten to relax.
That relaxation is important. If the dough springs back while rolling, the round will be thicker in the centre and thinner at the edges, which makes even puffing less likely. Rest the covered dough for another 10 minutes rather than forcing it thinner.
How to Get a Pocket on the Stovetop
How to Get a Pocket on the Stovetop
Use a dry pan that is properly hot before the first pita goes in. The dough needs firm contact with the surface to build steam quickly. After about a minute, bubbles should appear and the underside should show light golden patches. Flip the pita, then turn it once more if one side needs extra heat.
Do not press down hard with the spatula. Pressing can release the steam that needs to inflate the pocket. If the pita browns before it puffs, lower the heat slightly; if it stays pale and dry, the pan may be too cool.
Dough and Shaping Tips
Dough and Shaping Tips
The finished dough should feel smooth, elastic, and slightly tacky. Avoid adding large amounts of flour during kneading or shaping because a dry dough produces a stiffer pita. Use just enough flour to keep the work surface from sticking.
Divide the dough evenly so the pitas cook at the same speed. Roll each piece to 18–20 cm and check that the centre is not noticeably thicker than the edges. Keep both the dough balls and rolled rounds covered while you work so they do not form a dry skin.
Serving, Storage, and Freezing
Serving, Storage, and Freezing
Wrap cooked pitas in a clean towel immediately. Once cool, store them in an airtight bag for up to 3 days. Warm them briefly on a dry pan before serving to restore flexibility.
For longer storage, freeze the cooled pitas in an airtight bag for up to 3 months. Reheat them from frozen on a dry pan, or thaw them first and warm them for a few seconds on each side. Avoid overheating, which dries the bread.
Portion and Goal Fit
Portion and Goal Fit
One pita is approximately 280 calories, with 8 g protein, 53 g carbohydrate, and 3 g fat. Values are estimates and exclude fillings, dips, and serving accompaniments.
For a balanced meal, fill one pita with lean protein such as chicken or falafel, at least one generous portion of salad vegetables, and a moderate amount of hummus or tzatziki. The pita can also be served as part of a shared mezze plate.
Nutrition Facts
Nutrition Facts
Serving Size: 1 pita (about 120 g dough)
Calories 28014%
% Reference Intake*
Total Fat 3g4%
Saturated Fat 0.5g3%
Trans Fat 0g
Cholesterol 0mg
Sodium 500mg
Total Carbohydrates 53g20%
Dietary Fiber 2g
Sugars 2g2%
Protein 8g16%
* Reference intakes are based on an average adult's 8,400 kJ / 2,000 kcal diet. Your needs may be higher or lower.
FAQs
Why did my pita not puff?
The pan may not have been hot enough, the dough may have been rolled unevenly, or the rounds may have needed more rest. Use a properly heated dry pan, roll to an even thickness, and let the dough relax before cooking.
Can I make these pitas without a stand mixer?
Yes. Mix in a large bowl and knead by hand for 12–15 minutes until smooth, elastic, and slightly tacky. The dough becomes easier to handle as the gluten develops.
Can I freeze homemade pita bread?
Yes. Cool the pitas completely, stack them with parchment if desired, and freeze them in an airtight bag for up to 3 months. Reheat from frozen on a dry pan or thaw first and warm briefly.
Can I bake these pitas in the oven?
Yes. Bake on a preheated stone or heavy tray at 230C for about 5–6 minutes, until puffed. The stovetop method is the intended no-oven method here.
Why is my pita chewy or tough?
Too much flour during shaping, under-rested dough, or overcooking can make pita tough. Keep the dough slightly tacky, use minimal dusting flour, and wrap each pita as soon as it leaves the pan.
Community Reviews
See how other home cooks made this recipe, then share your own experience.
4.8
6 ratings
5
83%
4
17%
3
0%
2
0%
1
0%
How would you rate this recipe?
Share your experience and help others.
Daniel
· 1 Sept 2026The corrected dough weight and shorter pan cooking time made the batch much more consistent from one pita to the next.
Lisa Evans
· 14 Oct 2025I froze several pitas and reheated them on a dry pan. They stayed flexible and were useful for quick meals.
Tuli
· 14 Oct 2025The stovetop method worked well, and wrapping the cooked pitas kept them soft enough for lunch.
Re
· 14 Oct 2025Covering the rolled rounds while the pan heated stopped them drying out and helped them puff evenly.
Maayan
· 14 Oct 2025The double rest made the dough easy to roll, and the pitas formed useful pockets without an oven.
Dave
· 13 Oct 2025These puffed beautifully on my griddle and stayed soft in a towel.
Create Your Own Recipe
Add your personal creations and build your own recipe collection.