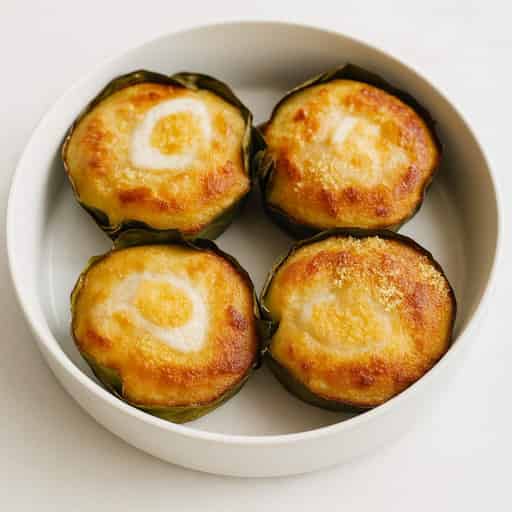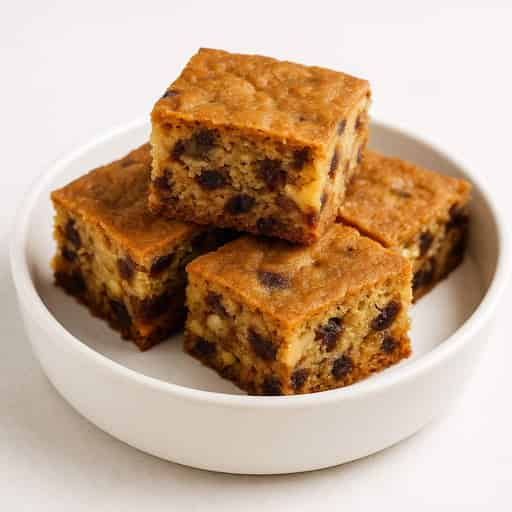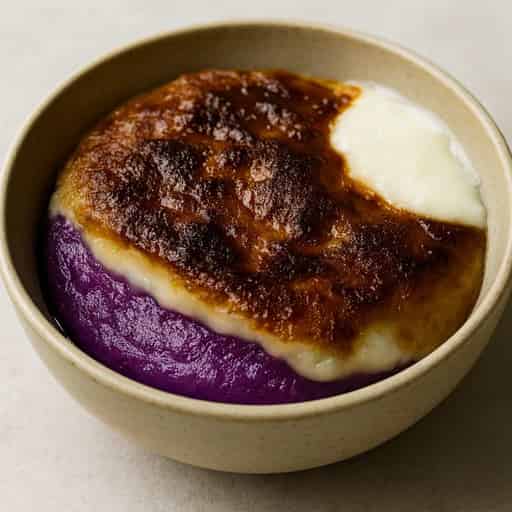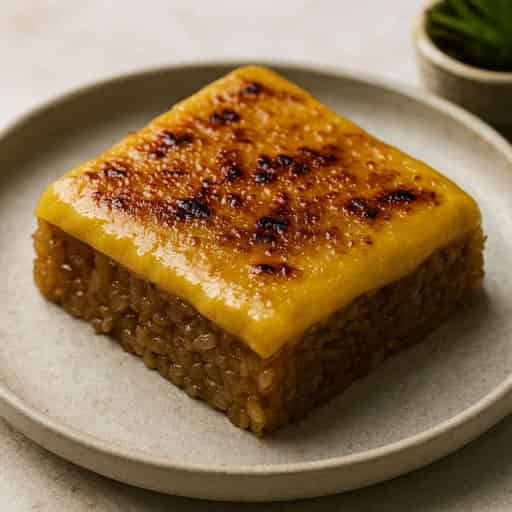
Filipino biko made with chewy glutinous rice, coconut milk, and brown sugar, topped with a creamy yema spread and an optional caramelized finish.
Prep time
10 mins
Cook time
40 mins
Total time
50 mins
Servings
8
Recipe Snapshot
DifficultyMedium
MealSnack / Dessert
Family FriendlyYes
CuisineFilipino
Chef's Tips
Torch lightly to caramelize the yema topping without burning.
Use malagkit (glutinous rice) for the best sticky texture.
Tools Used
We use affiliate links, which may earn us a small commission at no extra cost to you.
Ingredients
Ingredients
Servings
8 servings1×
Scale
Ingredient amounts update instantly.
Biko Base
Yema Spread (Simplified Recipe)
Instructions
Cook the Biko
- 1
Wash the glutinous rice and drain.
- 2
In a saucepan, combine coconut milk, brown sugar, and salt. Stir until dissolved.
- 3
Add the rice and cook over medium heat, stirring often, until the mixture thickens and the rice is fully cooked.
- 4
Transfer into a greased dish and flatten the top.
Make the Yema Spread
- 1
In a saucepan, whisk egg yolks, condensed milk, and evaporated milk until smooth.
- 2
Cook over low heat, stirring constantly until thick and spreadable.
- 3
Add butter and vanilla, then mix until glossy. Let cool slightly.
Assemble & Finish
- 1
Spread a generous layer of yema over the cooled biko.
- 2
If using a kitchen torch, let the yema set briefly, then pass the flame lightly over the surface until golden in spots.
- 3
Slice into squares and serve for merienda, gatherings, or celebrations.
Plan This Recipe
Save this recipe to one of your meal plans or browse your existing plans.
Learn More
Everything you want to know about this recipe.
What Is Biko with Yema?
What Is Biko with Yema?
Biko is a Filipino sticky rice cake made with glutinous rice, coconut milk, brown sugar, and salt. This version keeps that chewy coconut-rich base but tops it with a creamy yema spread made from egg yolks, condensed milk, evaporated milk, butter, and vanilla. The torch finish is optional; the biko and yema are the identity of the dessert.
For a more traditional latik-and-coconut topping, see Sticky Biko with Latik and Coconut Jam. This page is a yema-topped variation, not a replacement for the classic biko style. If you want to explore yema in a cake rather than as a biko topping, see Yema Cake.
Why This Recipe Works
Why This Recipe Works
The glutinous rice releases starch as it cooks directly in the sweetened coconut milk, creating biko’s characteristic chew. Coconut milk supplies richness and brown sugar adds deeper caramel notes. Stirring frequently helps the rice cook evenly and prevents the sweet coconut mixture from catching on the bottom.
The yema works as a spread because condensed milk provides sweetness and body, evaporated milk loosens it, and egg yolks thicken and enrich the mixture. Butter adds gloss and richness. Gentle heat and constant stirring are important: the yolks should thicken the mixture gradually rather than scramble.
Getting the Biko and Yema Right
Getting the Biko and Yema Right
Use a heavy saucepan or wide, thick-based pot for the biko. Keep the heat at a gentle simmer and stir more often as the rice thickens. The rice is ready when the grains are completely tender and the mixture is cohesive, glossy, and moist rather than dry. It should hold its shape when transferred to the dish but still look soft enough to settle.
For the yema, look for a mixture that coats the spatula and leaves soft trails that slowly close. It should be thick enough to sit on the biko without running off, but still spreadable. It will continue to thicken as it cools, so remove it from the heat before it becomes stiff.
Biko and Yema Troubleshooting
Biko and Yema Troubleshooting
- Runny yema: Cook it gently for longer, stirring constantly, until it coats the spatula. If it was spread while very hot, let it cool briefly before judging the final consistency.
- Lumpy or scrambled yema: The heat was too high or the mixture was not stirred continuously. Strain it while warm if small lumps remain; severe scrambling cannot be fully repaired.
- Yema too thick: It was cooked past the spreadable stage. Stir in a small splash of evaporated milk over low heat until it loosens, then cool slightly before spreading.
- Oily or separated yema: Excessive heat or insufficient emulsifying can cause separation. Remove it from the heat earlier and whisk in the butter until glossy.
- Biko catching or drying: Lower the heat and stir more frequently. Add a small splash of hot water only if the rice is tender but the mixture has become too thick before transfer.
Optional Torch Finish, Serving, and Storage
Optional Torch Finish, Serving, and Storage
Cool the biko slightly before spreading on the yema so the layers remain distinct. If using a torch, let the yema set first, then pass the flame lightly over the surface until a few golden caramelized patches appear. Keep the flame moving and do not hold it close to one spot. A broiler is only an alternative when the dish is explicitly broiler-safe; never place ordinary glass or non-rated bakeware under direct heat.
Serve in small squares with coffee, tea, or hot chocolate. It works for merienda, potlucks, family gatherings, and celebrations, not only for Noche Buena.
For the best make-ahead texture, cook the biko and yema separately, cool both, and refrigerate them covered. Assemble on the day of serving. If already assembled, refrigerate within two hours and use within 2–3 days. Chilling firms the rice, so let it sit briefly at room temperature before serving. Do not reheat the assembled dessert because the yema can loosen or separate.
Nutrition Facts
Nutrition Facts
Serving Size: 1 slice
Calories 32016%
% Reference Intake*
Total Fat 12g17%
Saturated Fat 7g35%
Trans Fat 0g
Cholesterol 80mg
Sodium 90mg
Total Carbohydrates 48g18%
Dietary Fiber 1g
Sugars 28g31%
Protein 6g12%
* Reference intakes are based on an average adult's 8,400 kJ / 2,000 kcal diet. Your needs may be higher or lower.
FAQs
Can I use ready-made yema spread?
Yes. Choose a thick, spreadable yema rather than a runny sauce. Homemade yema gives the freshest flavour, but a ready-made spread is practical.
What consistency should the yema have?
It should coat a spatula and hold soft trails while remaining easy to spread. It will firm slightly as it cools, so do not cook it until stiff.
Do I need a kitchen torch?
No. Torching is optional. If you use one, cool and set the yema first, then pass the flame lightly over the surface without holding it in one place. A broiler is only suitable with a broiler-safe dish; do not put ordinary glass or non-rated bakeware under direct heat.
How should I store Biko with Yema?
Cover and refrigerate the assembled dessert within two hours. It is best within 2–3 days. The biko will firm when chilled, so let it sit briefly at room temperature before serving; do not reheat the assembled dessert.
Community Reviews
See how other home cooks made this recipe, then share your own experience.
4.8
4 ratings
5
75%
4
25%
3
0%
2
0%
1
0%
How would you rate this recipe?
Share your experience and help others.
liza
· 12 Apr 2026Sarap! Perfect with a hot cup of coffee.
Evelyn Paguirigan
· 11 Feb 2026Delicious! 😋 I tried it today and my kids loved it.
Cookingtripco
· 9 Nov 2025Sarap niyan, bro! 😋👌 Papunta na ako para tumikim!
Ria Epe-Gonzales
· 10 Sept 2025Waaah, excited for the Christmas season! 🎄 This is a must-try for Noche Buena.
Create Your Own Recipe
Add your personal creations and build your own recipe collection.