14 November 2025
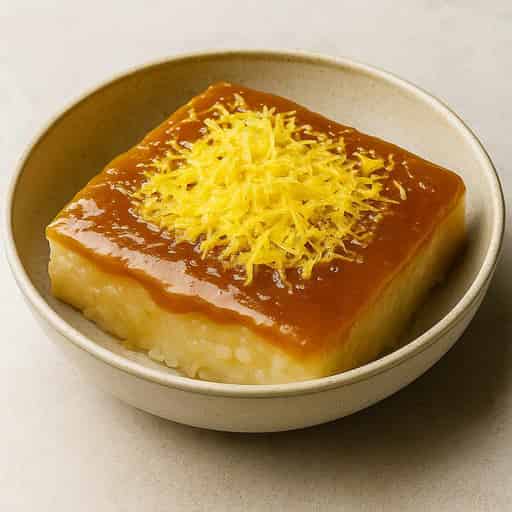
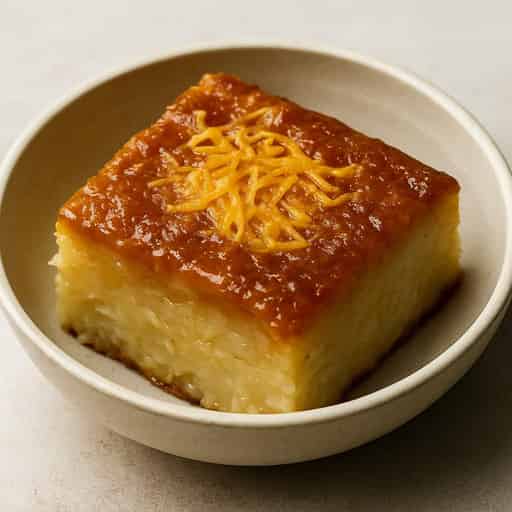
Caramelised Banana Burnt Basque Cheesecake
RecipeShare Test Kitchen

Small-batch burnt Basque cheesecake with caramelised banana, French-style custard centre and bronzed top—perfect 6-inch dessert for two to four.
A small-batch Basque cheesecake with deep banana flavour, silky custard texture, and a bronzed top. The structured recipe card below covers the ingredients, timings, and full method, while these notes explain the decisions that make this version work.
Why the banana is caramelised first
Cooking the banana before it goes into the batter concentrates its flavour and drives off the raw, slightly starchy note that can make banana cheesecakes taste flat. The sugar and butter turn it into a soft caramel-like puree, so the fruit reads as deeper and more rounded once baked.
This also keeps the filling more even. Instead of pockets of soft fruit releasing moisture during baking, the puree blends cleanly into the cream cheese base and supports the classic Basque contrast between a dark top and a custardy middle.
How to judge doneness
The centre should still wobble when the tin is nudged, but the outer edge needs to look set. That wobble matters more than the exact minute count because small tins, oven calibration, and batter temperature can shift the bake quite a bit.
If the top colours too quickly before the middle is ready, reducing the oven slightly for the last part of the bake is better than leaving the cheesecake in at full heat and hoping it settles later. A burnt Basque cheesecake should look deeply bronzed, not dry or overbaked.
Best texture for serving
This cheesecake changes noticeably between cold and room temperature. Fully chilled, it slices neatly and tastes more like a dense custard cheesecake. After 20 to 30 minutes at room temperature, the centre softens and the banana-caramel notes come forward more clearly.
For a small-batch dessert like this, the best approach is to bake it a day ahead, chill it overnight, and bring out only the portion you plan to serve. That keeps the texture clean while still giving you the softer centre that makes Basque cheesecake appealing.
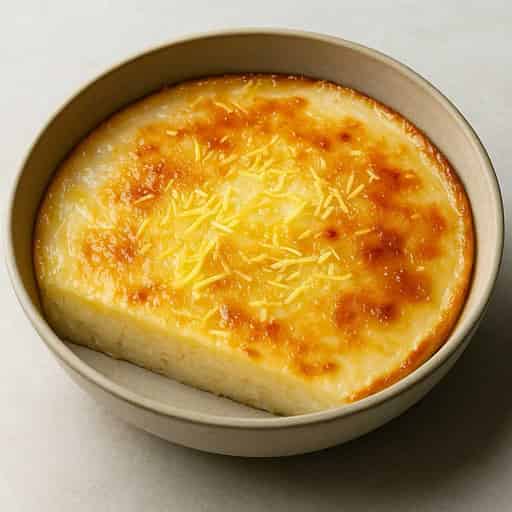
If you want the main Basque cheesecake version without the banana variation, see Burnt Basque Cheesecake.
Caramelised Banana Burnt Basque Cheesecake
RecipeShare Test KitchenSmall-batch burnt Basque cheesecake with caramelised banana, French-style custard centre and bronzed top—perfect 6-inch dessert for two to four.

Chef's Tips
Caramelise the bananas first to avoid raw banana flavour and build deep, compote-like notes.
Use medium heat when caramelising so the bananas brown slowly without burning.
Rest the cheesecake batter for 10–15 minutes to release air bubbles for a silky, custard-like texture.
Use room-temperature cream cheese, eggs and dairy to prevent lumps and overmixing.
Bake at high heat to achieve the signature burnt Basque top and creamy centre.
If the top browns too quickly, reduce the oven to 210°C fan for the last 10 minutes.
Judge doneness by the wobble in the centre rather than the timer alone.
Chill the cheesecake fully, then let it stand at room temperature before serving for the best texture.
Tools Used
Parchment Paper(opens in a new tab)Mixing Bowls(opens in a new tab)Hand Whisk(opens in a new tab)Rubber Spatula(opens in a new tab)Fine Mesh Sieve(opens in a new tab)Oven
We use affiliate links, which may earn us a small commission at no extra cost to you.
Ingredients
USMetric
Caramelised Banana Base
Cheesecake Batter
Pan Preparation
Instructions
Prepare the Caramelised Banana Base
- 1
Slice the peeled bananas into even rounds.
- 2
Warm the butter in a skillet over medium heat until foamy and lightly browned at the edges.
- 3
Sprinkle in the brown sugar and a pinch of sea salt, stirring until the sugar melts and turns a deep amber.
- 4
Add the banana slices in a single layer and cook for 2–3 minutes per side, just until caramelised and softened.
- 5
Deglaze the pan with dark rum or vanilla, scraping up any caramelised bits from the bottom.
- 6
Transfer everything to a bowl, add the optional miso if using, and mash into a smooth purée. Let cool completely.
Make the Cheesecake Batter
- 1
Preheat the oven to 220°C fan (240°C conventional).
- 2
In a mixing bowl, whisk the cream cheese and caster sugar together until smooth and lump-free, keeping the whisking gentle to avoid excess air.
- 3
Add the eggs one at a time, whisking just until each egg is incorporated.
- 4
Whisk in the crème fraîche, heavy or double cream, fine sea salt and cooled caramelised banana purée. Add banana extract if using.
- 5
Sieve the cake flour or cornstarch over the batter and fold gently with a spatula until smooth.
- 6
Let the batter rest for 10–15 minutes to allow air bubbles to rise to the surface, then tap the bowl lightly to pop them.
Prepare the Pan
- 1
Crumple two large sheets of parchment paper, then uncrumple them so they become flexible.
- 2
Press the parchment into the 6-inch tin, making sure it covers the base and sides and rises 5–7 cm above the rim to catch the rise.
- 3
Place the lined tin on a baking tray for easier handling.
- 4
Pour the rested batter into the tin; it should fill about 70–75% of the height.
Bake the Cheesecake
- 1
Bake at 220°C fan (240°C conventional) for 28–34 minutes.
- 2
For a very molten centre, aim for 28–30 minutes; the top should be deeply caramelised and the edges just set.
- 3
For a more set custard centre, bake for 32–34 minutes; the cheesecake should still wobble like loose custard in the middle.
- 4
If the top is browning too quickly, reduce the oven temperature to 210°C fan for the final 8–10 minutes.
- 5
Remove from the oven when the top is bronzed and the centre still has a pronounced wobble.
Cooling and Serving
- 1
Leave the cheesecake to cool in the tin at room temperature for about 1 hour.
- 2
Transfer the tin to the fridge and chill for 6–8 hours, or overnight, to fully set.
- 3
For a softer, more molten core, remove from the fridge 20–30 minutes before slicing.
- 4
Lift the cheesecake out of the tin using the parchment, peel back the paper and slice with a hot, clean knife.
- 5
Serve plain, with softly whipped cream, or with a drizzle of bitter caramel.
Save, Plan & Shop Smarter
Create and edit your own recipes, import from most websites, plan your week, and build smart grocery lists.
Import recipes from most websites
Create and edit your own recipes
Plan your week with the Meal Planner
Mark favourites for quick access
Build grocery lists from your meal plan
Tick off pantry items you already have
Browse this topic

Create your own recipe
Add your personal creations and build your own recipe collection.
Loading...